Build an LLM chatbot yourself to take orders on your website

Share it with your senior IT friends and colleagues
Reading Time: 4 minutes

Namaste and Welcome to Build it yourself.

In the tutorial, we will build an LLM based Orderbot – a chatbot that can orders from your clients. We will be using OpenAI’s API to create this.

Who is this article for?

If you think chatbots and AI/ LLM are not your stuff. Just go through this article and you will realize how easy it has become to create AI tools.

We will use this Google Colab Notebook – https://colab.research.google.com/drive/1aCyuoZCmtU3_LvxBOIJbRiK75xYJRoV3

This Notebook is from the course – https://www.deeplearning.ai/short-courses/chatgpt-prompt-engineering-for-developers/

I have customized it for my own website. You can do it too. 

I will teach you how to do that.

Pre-requirement

– OpenAI’s API key

– Open Mind to learn new things

Create your API key 

Don’t worry, it’s not a very technical thing. Just follow the below instructions to get it.

OpenAI provides an option to create an API key. We will just generate that.

Step 1 – Login to OpenAI – https://platform.openai.com › login

Create an account if you don’t have one already

Step 2 – Find “Personal” in the top right corner, click on it and then go to View API Keys

Step 3 – Click on “+ Create new secret key”, provide a name and you will get your API key

Make sure, you copy it and write it somewhere as you would not be able to access it again.

Basically, APIs are like messengers that transfer information from one software to another. 

You just have generated your API key for sending information to OpenAI from your own tool/ code.

Our bot will use OpenAI’s GPT model to answer questions.

Nothing technical and in case it’s not clear then just remember we need an API key from OpenAI for this to function.

Creating the chatbot

Now, let’s get back to the business and create our OrderBot.

Open the Notebook and start running the cells – https://colab.research.google.com/drive/1aCyuoZCmtU3_LvxBOIJbRiK75xYJRoV3

To run a cell, you need to hover on the [ ] and a play icon would appear. Click on it to run the cell. Once it’s done, a tick sign will appear next to it.

Step1 – import os.

Step2 – install openai using pip(package installer for Python)

Step3 – import openai

Nothing fancy till now, just installing and importing a couple of dependencies.

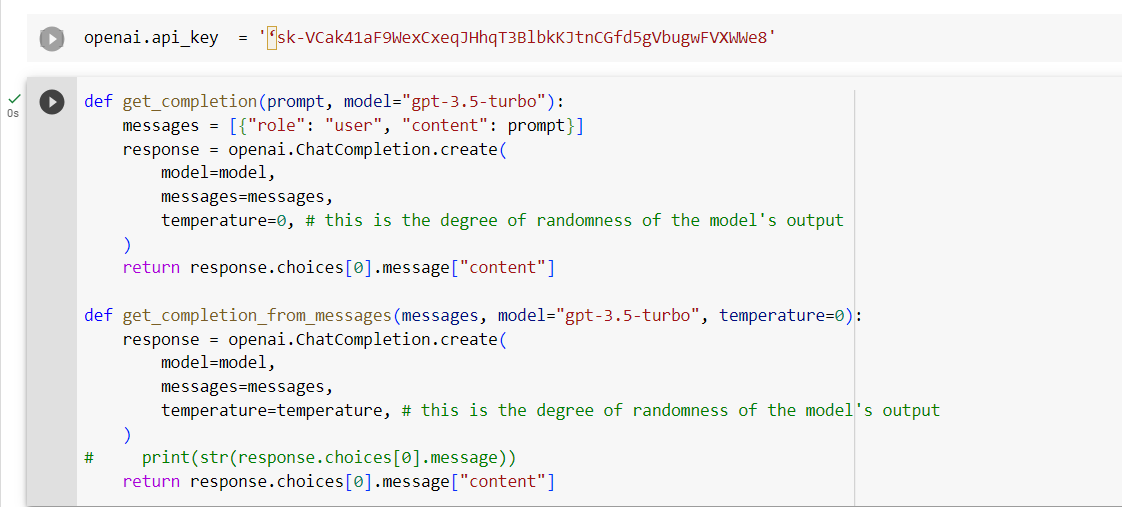
Step 4 – Add your API key that you generated earlier within the single inverted comma and run the code

Your output should look something like

Openai.api_key = ‘sk-VCak41aF9WexCxeqJHhqT3BlbkKJtnCGfd5gVbugwFVXWWe8’

This is a hypothetical key. So, don’t use it.

Step 5 – Run the code.

We have defined a function where we have specified the model that needs to be used for the chatbot and the prompts that we want to send.

Think of it as we are using the GPT model remotely using our API.

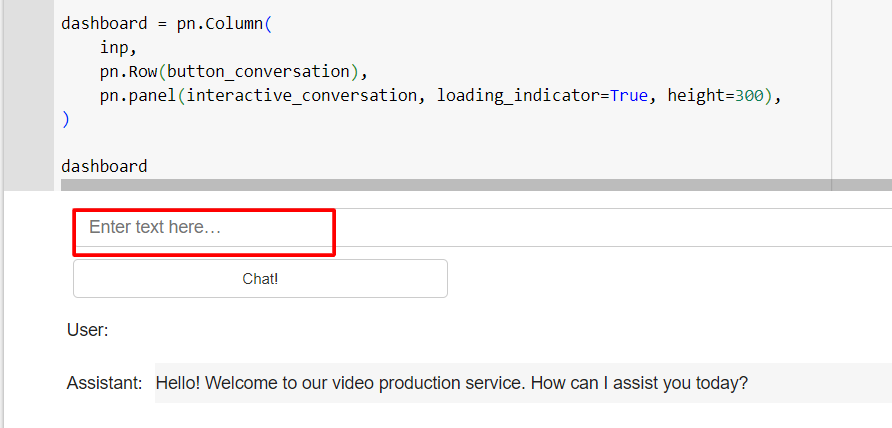
Step 6 – We are defining the roles and creating the chat interface. Run the cell as it is.

Step 7 – This is where we need to add our information. Set the context which you want.

Add details about your products, price, additional information you need for processing the order, etc

Once you have added the details then try the chatbot yourself. Step into your client’s shoes and ask multiple questions. Also, try asking irrelevant questions and see how the chatbot is responding. 

Step 8 – This will summarize the order for you. 

This chatbot is ready. You just need to build an interface around it and you can deploy it in your website.

Essentially, what we are doing is we are using theOpenAI’s model, instructing it to behave like an order-taking agent, and providing the model with our information.

The model learns from our information and then based on that communicates with the user.

You can now use your own creativity to customize this chatbot as per your need. 

Thanks for choosing to read it completely. I can try to simplify any AI concept for you.

In case you want me to simplify any AI topic, please let me know on LinkedIn – https://www.linkedin.com/in/nikhileshtayal/

Happy unleashing your creativity!

Here is how I learned AI as a non-technical person in 4 months for free.

Let’s learn to build a basic AI/ML model in 4 minutes (Part 1)

Share it with your senior IT friends and colleagues
Nikhilesh Tayal
Nikhilesh Tayal
Articles: 55